VISUAL RADIO
Introducing Visual Radio, transform your live broadcasts into dynamic visual experiences with the seamless integration of the trigger unit and its powerful software.
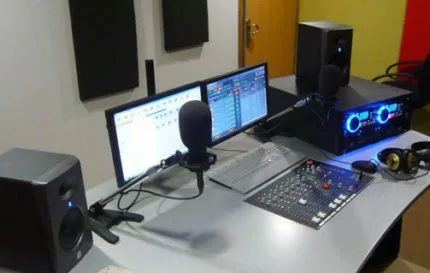
Enhance your live radio broadcasts with stunning visuals using Visual Radio.
The perfect trio; Camcon, VRC application software, and OBS provides everything you need to bring your broadcasts to life.
Connect up to 4 microphones to the 4-channel Camcon trigger unit, hardwired in series, for optimal control.
Utilize our VRC software to effortlessly switch scenes in OBS (freeware), ensuring a professional and engaging broadcast.
Broadcast your Visual Radio over the Internet, combining audio and visuals for an immersive listener experience.
features
The unit revolutionizes broadcasting by automatically triggering and switching scenes based on who is speaking. This is achieved through the Camcon application software, which monitors microphone levels and transmits this data over a USB connection to your PC, where the Visual Radio Control (VRC) software operates.
Key technical features:
-
Automatic scene switching: The Camcon unit uses microphone level measurements to determine which scene should be active. This ensures that the correct visual is displayed based on who is talking.
-
Integration with OBS: OBS (freeware) can use real audio devices connected as triggers, making the Triggerbox/Camcon incredibly user-friendly.
-
Seamless software connection: The VRC software connects the scenes from the broadcasting software to channels on the Camcon Visual Radio device. This integration ensures smooth operation and efficient control.
-
Advanced metering and MicOn data: With metering and MicOn information provided by Camcon, the VRC software can make informed decisions about which scene to activate at any moment.
-
Customizable settings: Users can adjust settings such as Priority, Hold Time, and Activation Delay to fit specific broadcasting needs.
Optimization note:
For optimal performance, it is recommended that the Camcon trigger unit also receives fader position information from the mixer. This can be achieved by connecting the mixer GPO (General Purpose Output) to the Camcon GPI (General Purpose Input) jack.
This connection informs Camcon of the fader’s position (up or down), preventing the camera from switching to a speaker whose fader is down.
All mixers come equipped with GPO connectors, facilitating this integration and enhancing the overall functionality of the Visual Radio system.
The front panel of the unit provides intuitive controls and indicators to manage microphone levels and system status effectively.
Key features:
-
Mic level adjustment: Incoming microphone levels can be adjusted using the pushbuttons on the front panel. This adjustment can also be made through the software for added convenience.
-
LED indicators: LEDs on the front panel display the current level settings and signal levels, providing clear visual feedback.
-
GPI/GPO status: Corresponding LEDs light up when GPI (General Purpose Input)
or GPO (General Purpose Output) is active, allowing for easy monitoring of these functions.
-
Status LEDs: Located on the right side of the front panel, these LEDs indicate when the unit is powered on and when the USB connection is active, ensuring the system is functioning correctly.
-
Microphone connection: For optimal performance, connect the microphone directly to the Camcon XLR input. Avoid routing the microphone through a processor to ensure accurate level measurement and control.
By utilizing these front panel features, you can effectively manage and monitor your Visual Radio system, ensuring seamless operation and high-quality broadcasts.
Key features:
-
Mic level adjustment: Incoming microphone levels can be adjusted using the pushbuttons on the front panel. This adjustment can also be made through the software for added convenience.
-
LED indicators: LEDs on the front panel display the current level settings and signal levels, providing clear visual feedback.
-
GPI/GPO status: Corresponding LEDs light up when GPI (General Purpose Input)
or GPO (General Purpose Output) is active, allowing for easy monitoring of these functions.
-
Status LEDs: Located on the right side of the front panel, these LEDs indicate when the unit is powered on and when the USB connection is active, ensuring the system is functioning correctly.
-
Microphone connection: For optimal performance, connect the microphone directly to the Camcon XLR input. Avoid routing the microphone through a processor to ensure accurate level measurement and control.
By utilizing these front panel features, you can effectively manage and monitor your Camcon Visual Radio system, ensuring seamless operation and high-quality broadcasts.
Power connection
-
Voltage requirements: Connect the Camcon to a power source within the range of 100 to 240 volts AC.
USB connection
-
Software interface: Use the included USB cable to connect the USB port on the back of the Camcon unit to your PC. This connection allows the Camcon to interface with the Visual Radio Control software.
Microphone connections
-
Hardwired Mic cables: Connect your microphone cables directly in and out of the Camcon unit. Ensure these connections are secure for optimal audio performance.
GPI and GPO connections
-
Stereo cable compatibility: The GPI (General Purpose Input) and GPO (General Purpose Output) jacks are configured for tip and
software VRC > OBS > vMix
OBS websocket server
Camcon Control (CCS) Software and Visual Radio Control (VRC) software.
Both software packages are essential for maximizing the functionality of your Camcon hardware and can be easily downloaded from our website.
Seamless integration for superior control
-
Software setup: Begin by installing the Camcon application software, followed by the OBS freeware. Only then install the VRC software to ensure it links seamlessly to both applications for optimal performance.
-
Signal flow: The straightforward signal flow—MIC > CAMCON > VRC > OBS—ensures efficient processing and control of your camera feeds.
-
Camera integration: The Camcon unit can manage up to 4 cameras, enhancing the capabilities of any mixing console and creating a visually dynamic broadcast experience.
Optimized for OBS studio
Currently, Camcon Visual Radio Control supports only OBS Studio, the leading free and open-source software for video recording and live streaming. With the VRC software, Camcon data is processed to control cameras connected to OBS, offering precise and automated scene switching based on microphone activity.
Future-proofing with vMix compatibility
While we work on launching our own interface between VRC and vMix, you can still utilize vMix by following these steps:
-
Setup OBS studio: Configure OBS Studio to output to a network video stream with minimal compression and buffering to reduce latency.
-
Camera control: Use OBS Studio to control the required cameras and set up Visual Radio Control as usual.
-
vMix configuration: Configure vMix to pick up the network video stream created by OBS Studio, integrating it into your workflow seamlessly.
More scenes
The Visual Radio Control (VRC) software offers a comprehensive suite of features to manage and optimize your broadcast scenes, providing unparalleled control and flexibility. Here’s how you can make the most of these powerful tools:
Adding a scene
Effortlessly add new scenes to your broadcast setup, allowing you to switch between different visual setups with ease.
Editing scenes
Customize your scenes to match your broadcast needs. Adjust visual elements, layouts, and configurations to ensure each scene meets your specific requirements.
Modifying scenes
Quickly make changes to existing scenes, ensuring your broadcast remains fluid and adaptable. Modify elements on-the-fly to keep your content fresh and engaging.
Removing scenes
Easily remove unwanted or outdated scenes from your setup.
Scene properties
Adjust detailed properties of each scene to fine-tune your broadcast. Control various aspects such as background colors, overlays, and more to create a polished and professional appearance.
Naming scenes
Organize your scenes effectively by assigning descriptive names. This makes it simple to identify and switch between scenes during a live broadcast.
Source audio
Integrate audio sources seamlessly with your scenes. Ensure that each visual element is paired with the appropriate audio for a cohesive viewing experience.
Source MicOn
Utilize the Source MicOn feature to automatically switch scenes based on microphone activity. This ensures that the camera focuses on the active speaker, enhancing viewer engagement.
Threshold metering
Set threshold levels for microphone input to trigger scene changes. This allows for precise control over when scenes switch based on audio levels, ensuring smooth transitions.
Scheduling priority
Manage the priority of scenes based on a schedule. This feature allows you to automate scene changes, ensuring that your broadcast follows a predefined sequence.
Activation delay
Control the delay time before a scene becomes active. This feature helps in managing smooth transitions and avoiding abrupt changes, providing a better viewing experience
VRC software bridges the gap between your Camcon Unit and your mixing console, allowing for automated scene switching, precise control, and enhanced broadcasting capabilities.
technical specifications
Dimensions:
-
Front Left-Right: 482 mm
-
Frame Left-Right: 430 mm
-
Front-Back: 175 mm
-
Height: 44 mm (1U)
-
Front panel thickness: 2 mm
-
Radius corners: 20 mm
-
Weight: 5 kg
Related products
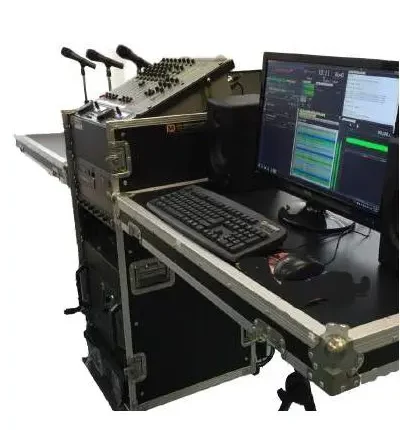
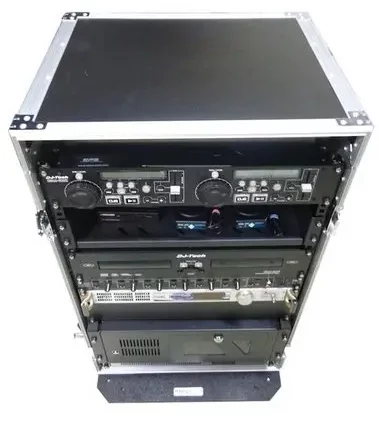
All equipment to Start an FM Radio Station in Africa
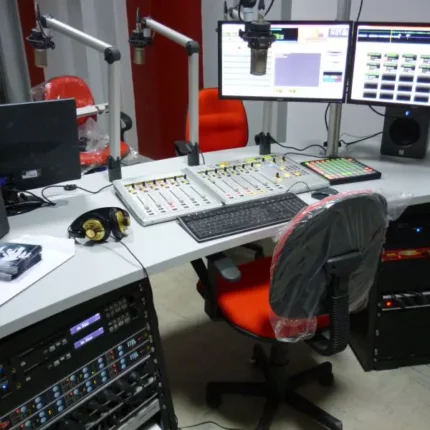
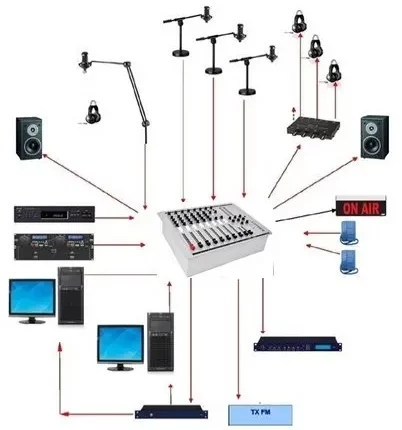
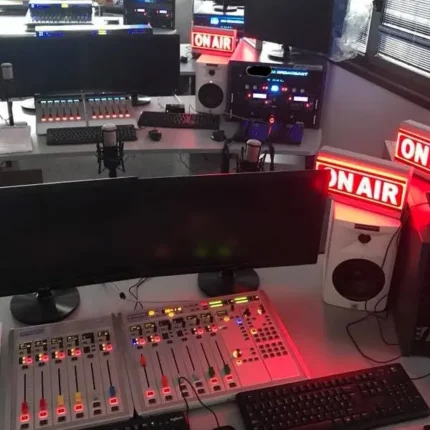
Radio Station Equipment
Setting up a radio station If you want to start up a full power FM radio station, we have complete equipments to start an fm radio stations.. When you need to update an on-air studio or construct a new studio complex, with automation and production capability.. Analog and digital production studios, audio managment, automation systems, networed audio solutions, ..